Update (April 10, 2015): The winner of the quiz is Janice Foreman and here are the details of all the steps shown below:
- Starting from the original in Photoshop, the first step used the “Replace Color” tool. This is found by Image–>Adjustments–>Replace Color. The settings in the dialog box were not recorded.
- Next, a sort of spotlight was added in the upper left corner, using the “Lighting Effects” tool. This is found by Filter–>Render—>Lighting Effects. The type of effect was “Spot.” There are 7 or 8 controls in this dialog box plus a capability to rotate the overall effect. A fun but dangerous tool in the hands of the inexperienced as you saw from the results of Step 2.
- The scene was reversed using the “Flip Canvas” tool. This is found by Image–>Rotate Canvas–>Flip Canvas Horizontal.
- To brighten the very dark results of Step 2, the standard technique of Layer–>New Adjustment Layer–>Curves was applied.
- To add a psychedelic touch along the roof’s rain gutter and the steps, I went for Filter–>Liquify. Another dangerous tool that can easily run amuck.
- Still unhappy with the overall darkness, I threw a Hail Mary pass and employed Filter–>Stylize–>Trace Contour.
- Now I had the opposite problem, it was too light. So I relied on the familiar “Curves” tool, this time to darken the image: Layer–>New Adjustment Layers–>Curves..
This is the first Friday of the month and now that we are safely past April Fool’s Day, it is time for Stacy’s gang of post-production protagonists to focus their talents on the same image. First, it would be appropriate to thank Cee for providing one of her images for whatever purpose the participants may choose. It may also be necessary for me to apologize for what happened to that image inside my computer. I hope she will forgive me, because my intentions were honorable.
My enthusiasm was so great this week that I neglected to take precise notes on what happened. However, I did manage to remember what tools were used, if not precisely how. Those with a competitive spirit are welcome to take the “Pop Quiz” at the end. The top score wins a prize (some conditions apply).
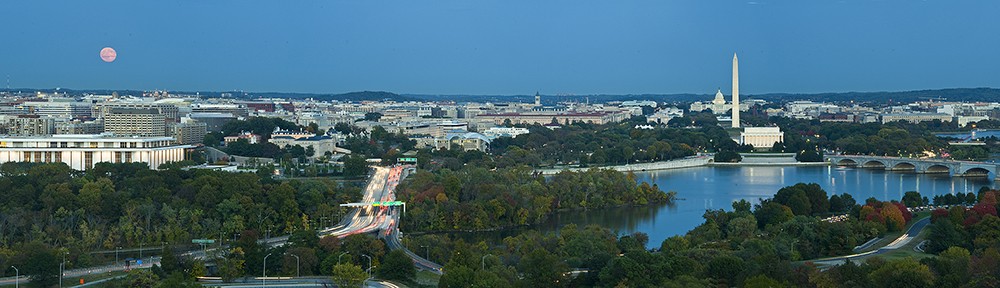
The first hint for the Photoshop Quiz is that I did not use the Adobe Camera Raw window, the image was opened directly in Photoshop and looked like this.

Original Image
My first thought was this could use a little more color, and so I tried a technique I have never used before. It worked pretty well. So well, in fact, that I used it three more times. The result after the 4th application is shown below.

After Step 1
Some might say that I had already gone too far, but when you are in unexplored territory, why go back? So I took a new direction and tried a totally different tool. The result is shown below. Those who are studying for the quiz deserve to know that while the tool was applied to the entire image, the key effect can be seen (major hint) in the upper left corner.

After Step 2
The next step was something I had intended to do all along so I executed that maneuver so I could then proceed to deal with the damage I had done in Step 2. The result is shown below.

After Step 3
I think everyone will agree that Step 2 made things too dark, so I fell back on a tool I use in almost every image (hint) and the result is shown below.

After Step 4
Now that the colors were a little better, it seemed like a little instability would be consistent with the radical color scheme. Another tool I have used on only one occasion (a fashion shot) was pulled out and deployed in a relatively conservative manner. Check the steps, the rain gutter, and a few other spots to see what happened.

After Step 5
Should I stop here? Of course not. It’s still too dark. Plus, there are so many tools I’ve never used in Photoshop, we should go for at least one more. However, as you will see from the image below, you will usually be surprised when you have no idea of what you are doing.

Step 6
Yikes! Stacy, we have a problem!
In a desperate attempt to salvage something without the humiliation of retreating, I used a familiar technique that resulted in the image below.

Step 7 (Final Image)
OK, for those few who might still be here, you have the option of going directly to Comments and expressing your outrage, or you can take a stab at the quiz.
Quiz Rules: A total of five major tools were used to arrive at this final image. One tool was used twice (Steps 4 and 7). The challenge is to:
- Identify the tool sequence (e.g., “Image–>Auto Contrast”) as best you can for any given step. Had this example been a correct one, the two correct steps would count as two points. Something like “Image–>Mode–>Grayscale” would be awarded one point, because the first part was correct.
Clear as mud? It gets worse. Anyone scoring a minimum of 3 points will be in the “Zone of Consideration” for the prize. The top score among those in the Zone will be awarded a copy of my self-published photography book (softcover edition) “Washington, D.C.” Answers are due by 0800 EST on April 7 and can be placed in the Comments section or via email to info@photographybykent.com.
In addition to all of that, please head over to Stacy Fischer’s site and check out what are almost certainly better efforts at this week’s OnePhoto Focus.

Is step 6 and 7 involve the sparkle paint daubs filter?
LikeLiked by 1 person
Thanks for getting the game, and especially for the being the first to come to the batter’s box. Unfortunately, however, the Paint Daub filter was not used anywhere in the sequence. But you do get one point for the first part of the sequence for that step, that is, “Filter” so you’re on the right track. “Filter Gallery” was not the second part, something else was. If you can identify the correct second step (and anything that may have followed) your score will go up.
LikeLiked by 1 person
Let me ponder more…
LikeLiked by 1 person
One additional hint, since you mentioned Steps 6 and 7. The sequence that produced the image in Step 6 started with “Filter,” followed by something(s) more. Step 7 was a separate sequence.
LikeLike
I want to play but I am not sure I will get them all. I want to say in artistic filters neon glow,or something edges, but I don’t spend enough time using them. Part of me was wanting to scream stop after step, yet I was also intrigued about where you were going.
LikeLiked by 1 person
Hi, Ben: No need to get them all. Just the most. Nato has already identified part of one, and I can add that Neon Glow was not used.
LikeLike
Argh can I add image transform to flip the image there has to be a point in that.
LikeLiked by 1 person
Well, that would be one way to do it, but Janice (jmeyersforeman) beat you by two minutes with the correct answer of Image->Image Rotation->Flip Canvas Horizontal. Sorry;-( But there are still other points available and additional hints can be found in the comments and my replies in this Comments section. Janice has the lead with 4 points at the moment.
LikeLike
Robin, I am just laughing and smiling as I sit here drinking my coffee! Thanks for getting my day off to a great start 😀 As I’ve already mentioned to you, your efforts ended up with something very appropriate for the season – I expect to see Easter bunnies hopping around somewhere!
Now, as for your quiz and wonderful contest (ooh, I want your book!), seems I’m going to be spending my Easter figuring out Photoshop to track down those steps. I suspect however, it will be in vain as Ben, at least, will leave all us Lightroom users in the dust. So, Robin, what’s the postal cost for shipping to Poland? 😉
Great fun post!
LikeLiked by 1 person
Hi, Stacy: Thanks for commenting. Yes, I knew I was taking a risk on the postage, because in addition to Ben, there are some sharp Photoshop folks in Australia as well as several other places around the globe. I hope Lorraine Turci doesn’t see this, because if she wins I’ll have to mail it to Port Lockroy, Antarctica.
LikeLiked by 1 person
LOL 😀
LikeLike
I don’t know anything about photoshop and couldn’t stop laughing — both at your postings and at the comments and replies. Happy Easter.
LikeLike
Oh my, I have played around in Photoshop, but only enough to come to my own end game. The only thing I know for sure is you flipped the image. LOL I would love to learn what steps you took though.
LikeLike
Hi Robin, reading this has been great fun, I am sure it was fun for you. I think that step six was Filter-Find Edges, and then for the final image you duplicated the layer and used your multiply blend mode. Step 3 was to use Image->Image Rotation->Flip Canvas Horizontal. I really want your book!! But other than these steps I am fairly lost as to your process. I can’t wait to see what others have said.
LikeLike
You now have lead with a total of 4 points which also puts you in the Zone of Consideration. Congratulations. Your Step 3 is correct (Image->Image Rotation->Flip Canvas Horizontal) for 3 points. Step 6 was partly correct (Filter–>Stylize) but the third selection was not “Find Edges.” Nato had identified “Filter” already, so no point for that, but since one has to click on “Stylize” to get to “Find Edges, you get the benefit of the doubt for Stylize and one point. Your guess for the final image was incorrect, although that might have had a similar effect. Very good. If no one comes up with more than 4 points you get the book.
LikeLiked by 1 person
What a fun interpretation. I agree it needed color and your photo is so full of it. I really like that you flipped the photo. I think the composition seems to work better. Shame on me for not thinking of it 🙂 I adore you playfulness and adventurous attitude with my photo. Excellent.
LikeLiked by 1 person
Thanks, Cee. I appreciate those comments, since it was originally your image.
LikeLike
This was a great read and an interesting quiz.
LikeLike
Thanks, James. I’m glad you liked it.
LikeLike
What a fun image! I’ve absolutely no idea what you’ve done with it, but it looks very interesting and it certainly looks like you’ve enjoyed yourself doing it! 🙂
LikeLike
Thanks, Katie, for the comments. Yes, this was fun to do. All kinds of strange things were happening as I randomly pulled one lever after another.
LikeLiked by 1 person
Now that was a fun post to read, Robin and it’s clear you had a ball playing. I’m new to Photoshop & Lightroom, so hard to guess. Did you use the colour burn blending tool at one of the earlier steps?
LikeLiked by 1 person
Thanks very much for commenting and for taking a stab at the quiz. While I did not use the blending mode of “Color Burn” you still get one point because one has to start the Sequence for Step 4 with “Layer–>Adjustment Layer—>? to get to a point where you can choose “Color Burn.” So as with Jmeyersforeman, you get the benefit of the doubt. This also is a major hint if you want to take another stab and finish this sequence.
LikeLike
Oh this was such a fun read and I’d love to know what steps you took as I have no idea, being a newbie to Photoshop and mainly use Lightroom.
LikeLike
Thanks very much for your comments. I’m glad you enjoyed the post. And don’t worry, after the deadline, I’ll reveal all. Stay tuned……
LikeLiked by 1 person
I must say I’m clueless about the steps but love your end result. Fun post.
LikeLike
Thanks very much, I’m glad you liked it. It was fun to see whether it was possible to extricate myself from the troubles my random choices were causing.
LikeLike
I love the fun commentary throughout the post. I haven’t played around in Photoshops filters enough to have any answers. But I love the exploration and the journey you took us on. Wonderful. 😀
LikeLiked by 1 person
Thanks for the nice review of the commentary. Always nice to know what people think. I should have the answers posted in this week’s ABFriday Forum along with the name of the winner. So maybe you’ll see a filter you’d like to take out for test drive;-)
LikeLiked by 1 person
There is nothing a little bit of humor can’t fix. Clueless about the steps, but I like this fun edit.
LikeLiked by 1 person
Thanks. I’m glad you enjoyed it.
LikeLiked by 1 person
Pingback: AbFriday Forum Week 44 | photographybykent
Awesome step by step update. I thought you might have added a light source or something in step two, especially when you hinted at the corner of the image. The brightening and darkening with curves I should have guessed, but didn’t, go figure. I was surprised that liquify created such sharp edges in the rain gutter.
Both the Lighting Effects and Liquify I had heard about but hadn’t tried. Replace Color and Trace Contour are adjustments I’d never heard of. Overall, a great way for you to learn about some of the adjustments. But the main reason I liked this final image had more to do with the fun post you wrote to go with it. 😀
LikeLike
Great ABF, both in your editing and in your commentary. I was shaking my head throughout wondering what you had been smoking, but step 6 really saved you. I prefer that one over your final, but only barely. Great job. This gives me the incentive to really experiment now! Thanks!
LikeLiked by 1 person
Thanks, Emilio. Yes, had I been smoking something I would have had an excuse, but alas, no excuses.It can be pretty bizarre when you essentially throw a dart in Photoshop.
LikeLike